# Project Members Management
# 1.Edit Role
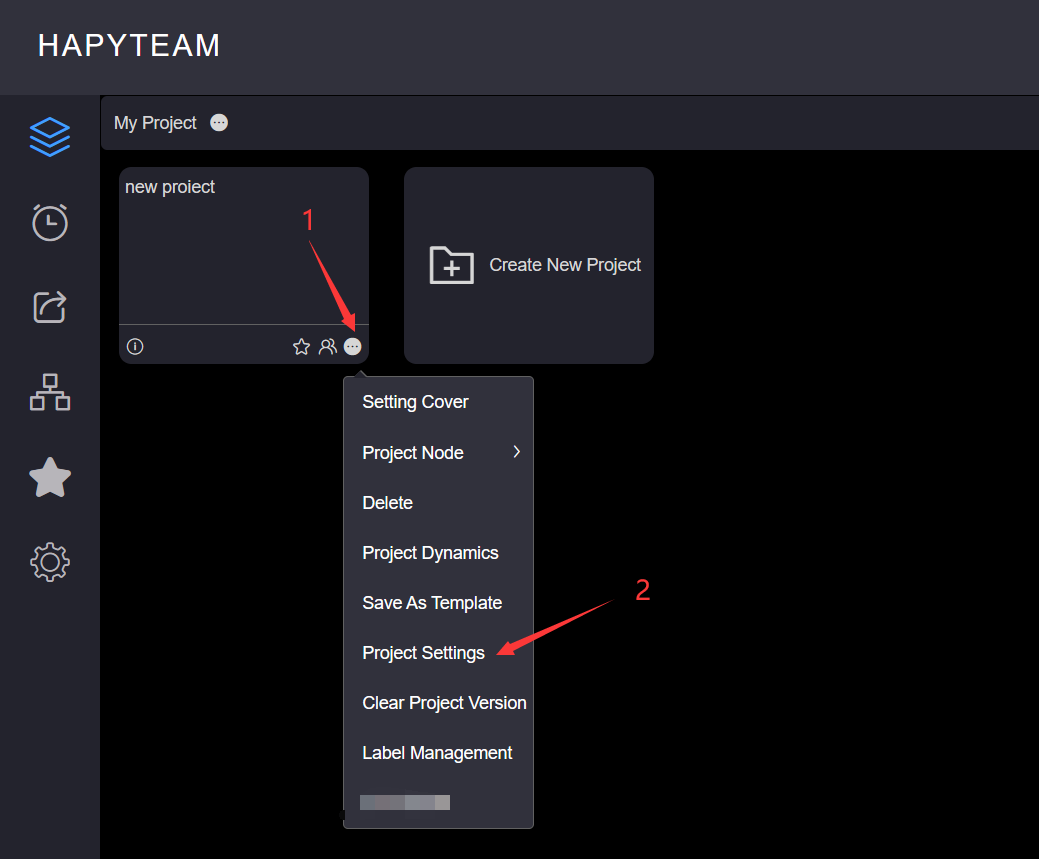
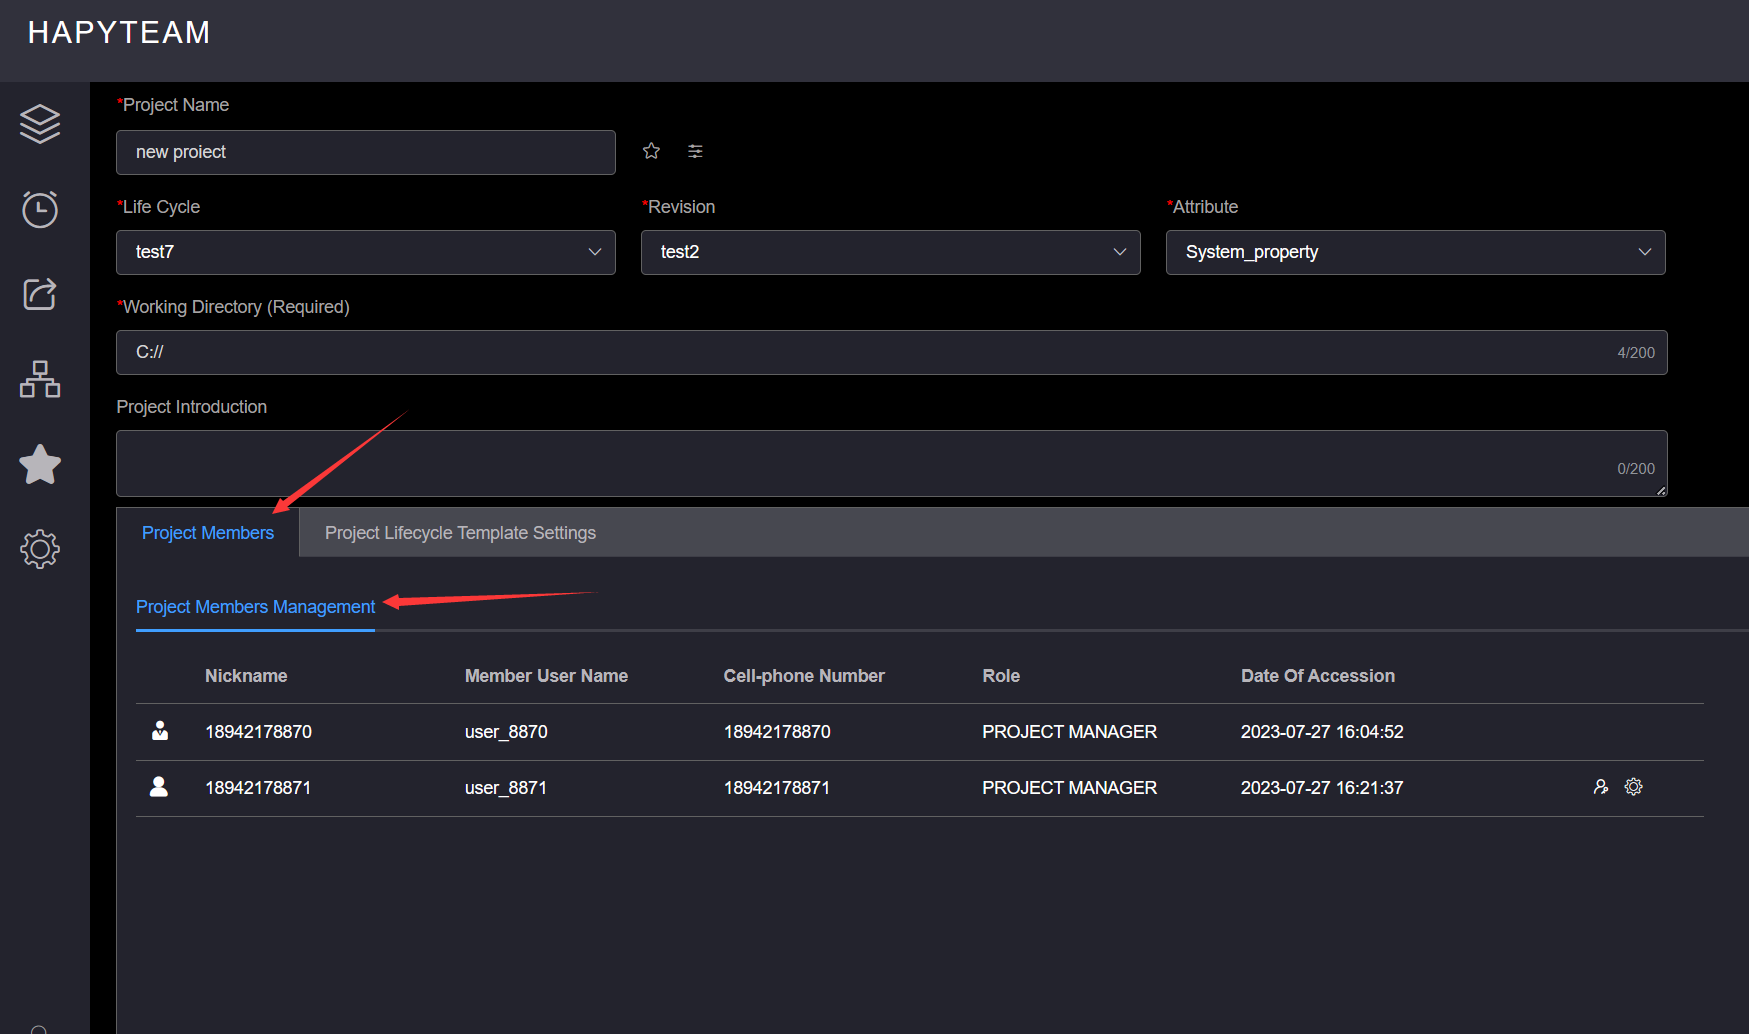
Click on the More Operations button at the bottom right of the project card where you want to edit the name, click on the *Project Settings *button to enter the project settings page, click on the Project Members to enter the project member management page
Click on the Role Editing button of the project member to perform role editing, and a role editing pop-up window will pop up
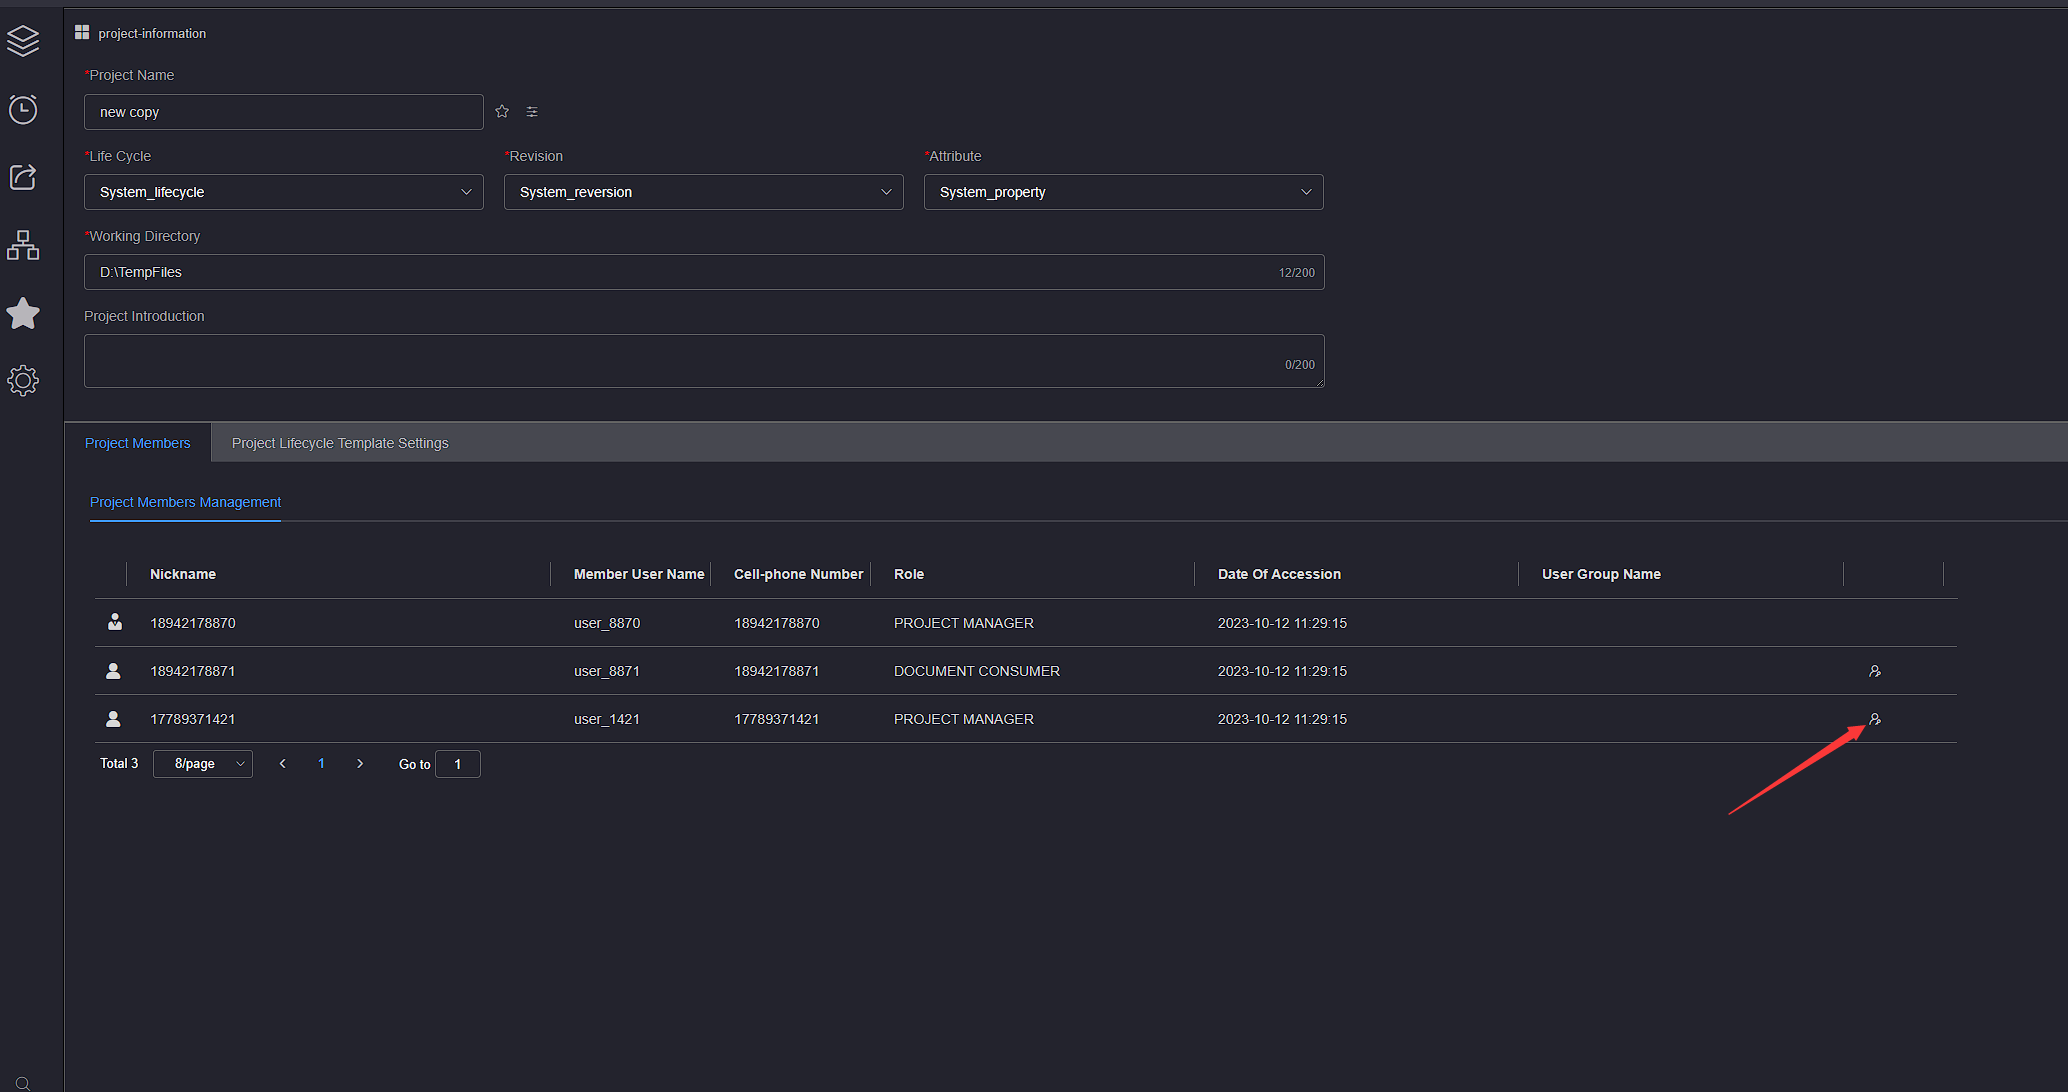
In the character editing pop-up window, click on the character drop-down list, select the target character, click the Submit button, and wait for the prompt message
When editing a role, you can only switch to roles other than the current one

# 2.Add Team User(Enterprise Edition)
Add Team User is a dedicated feature of HAPYTEAM Enterprise Edition, used to quickly batch add enterprise users to projects
On the Project Members, click on the Project Members Management, and then click the Add Team User button to pop up the Add Member tab page
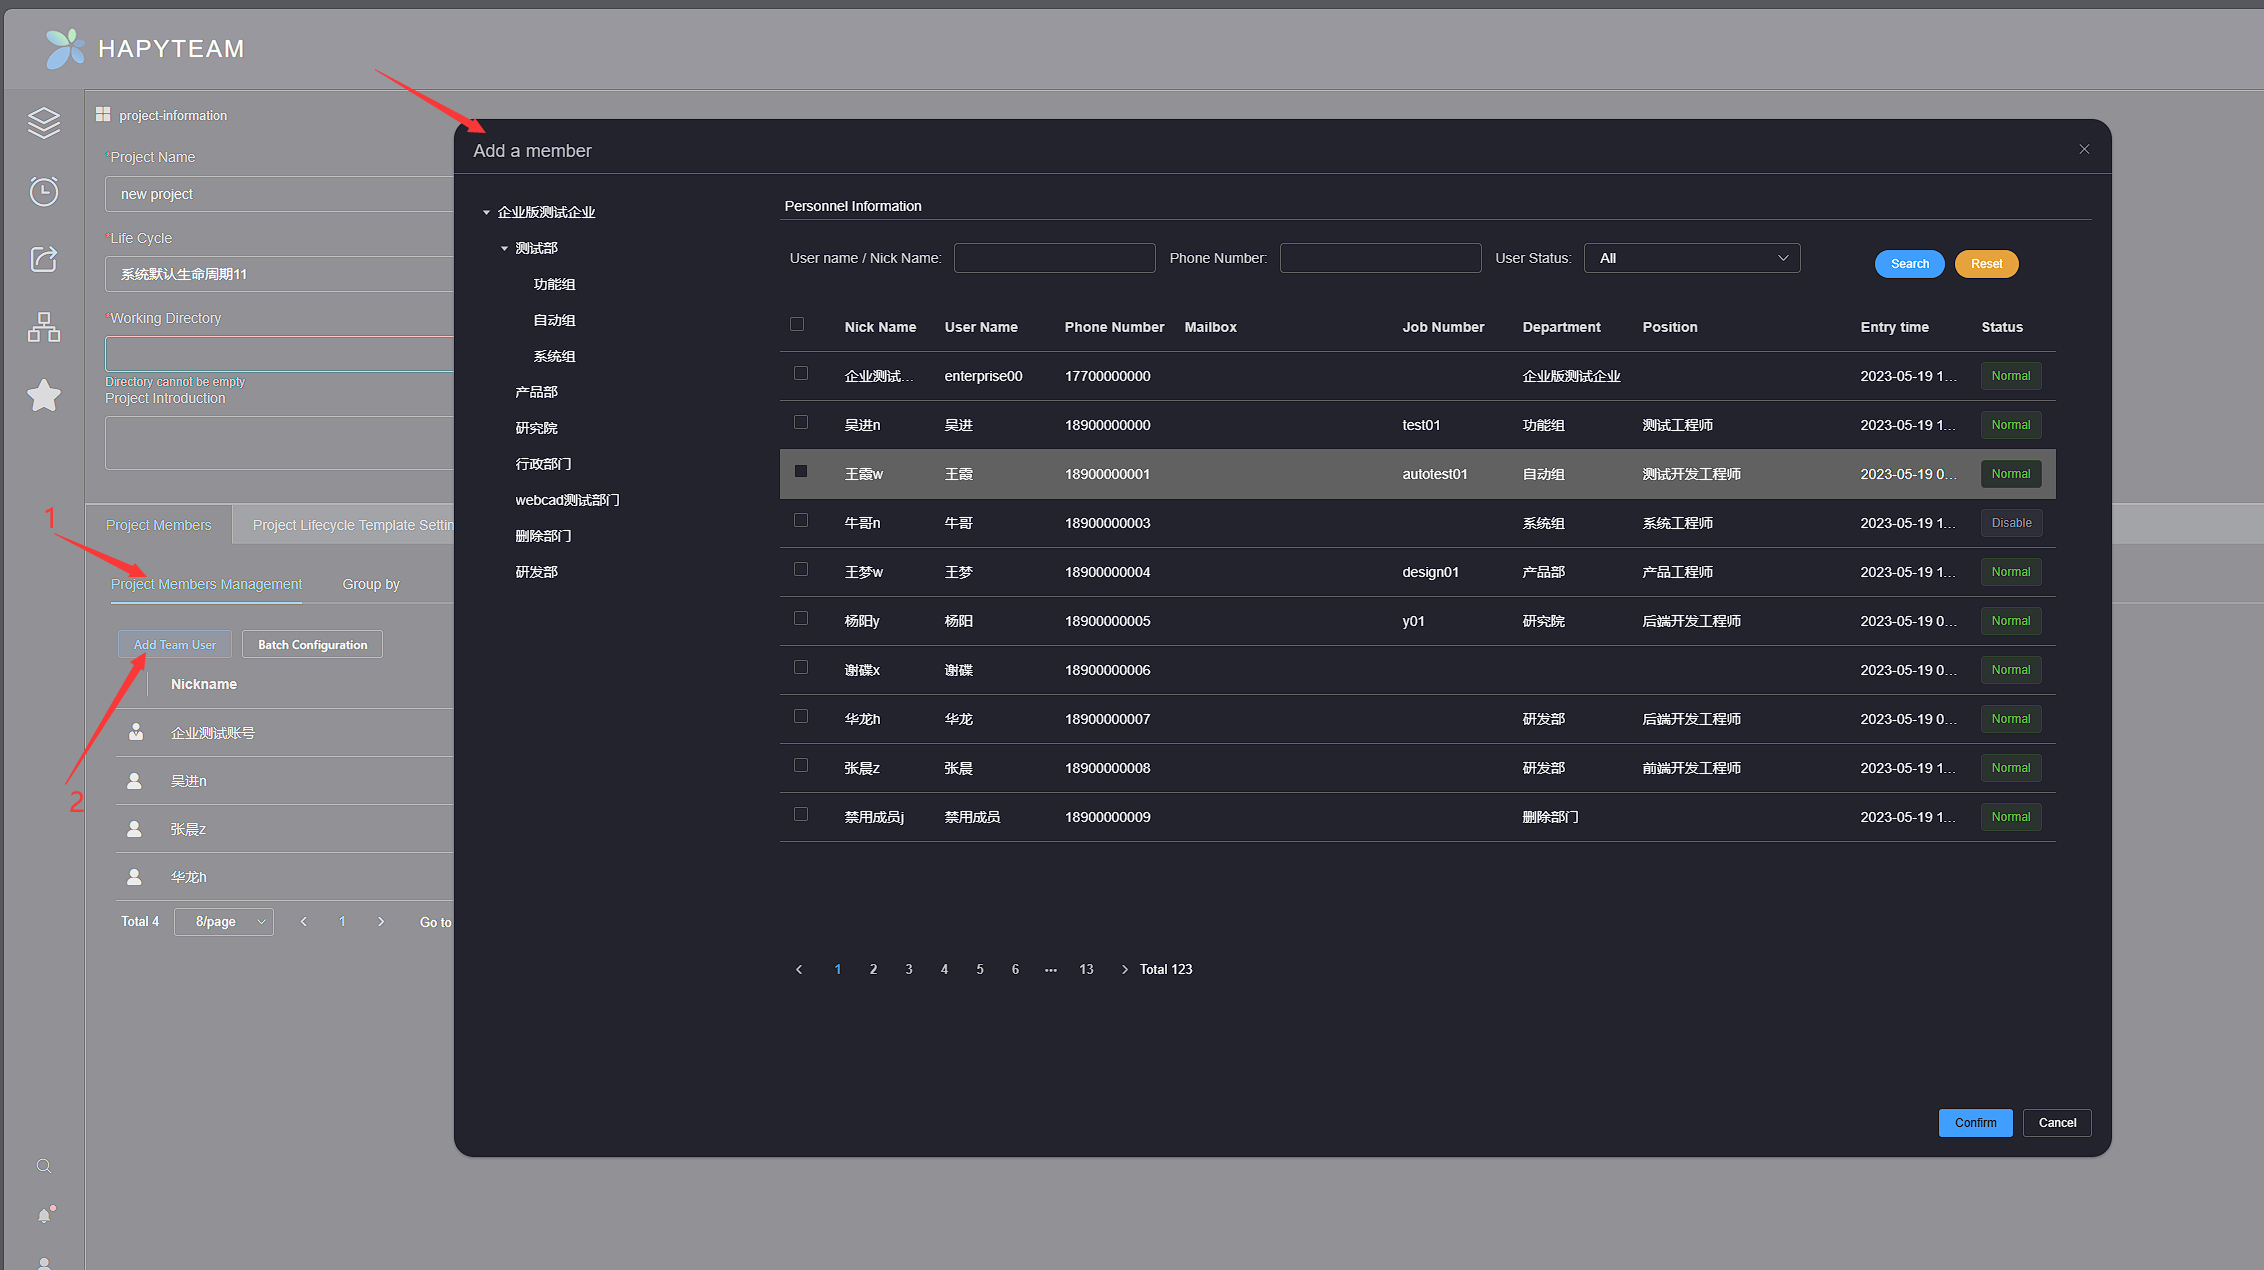
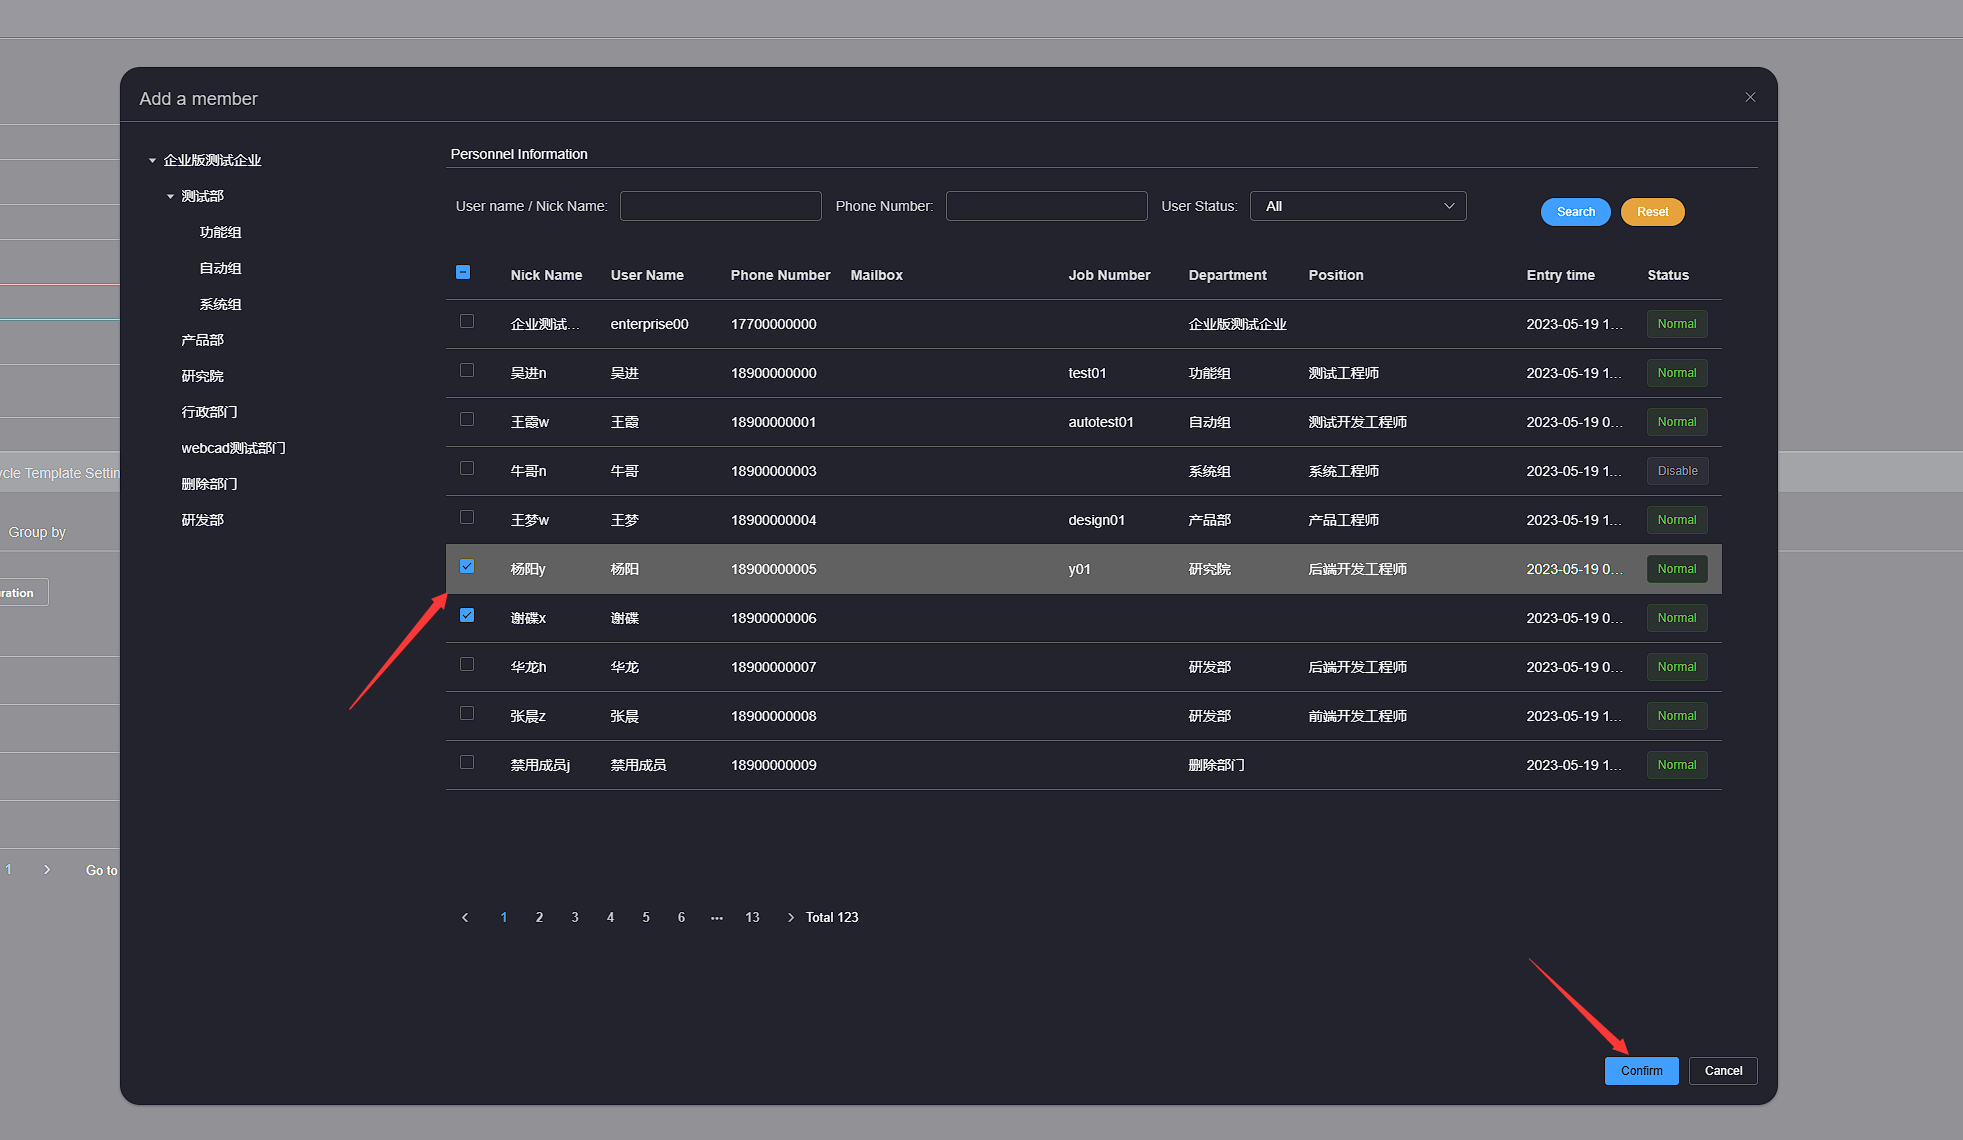
Check the enterprise personnel to be added to the project, click the confirm button below to enter the member role configuration interface
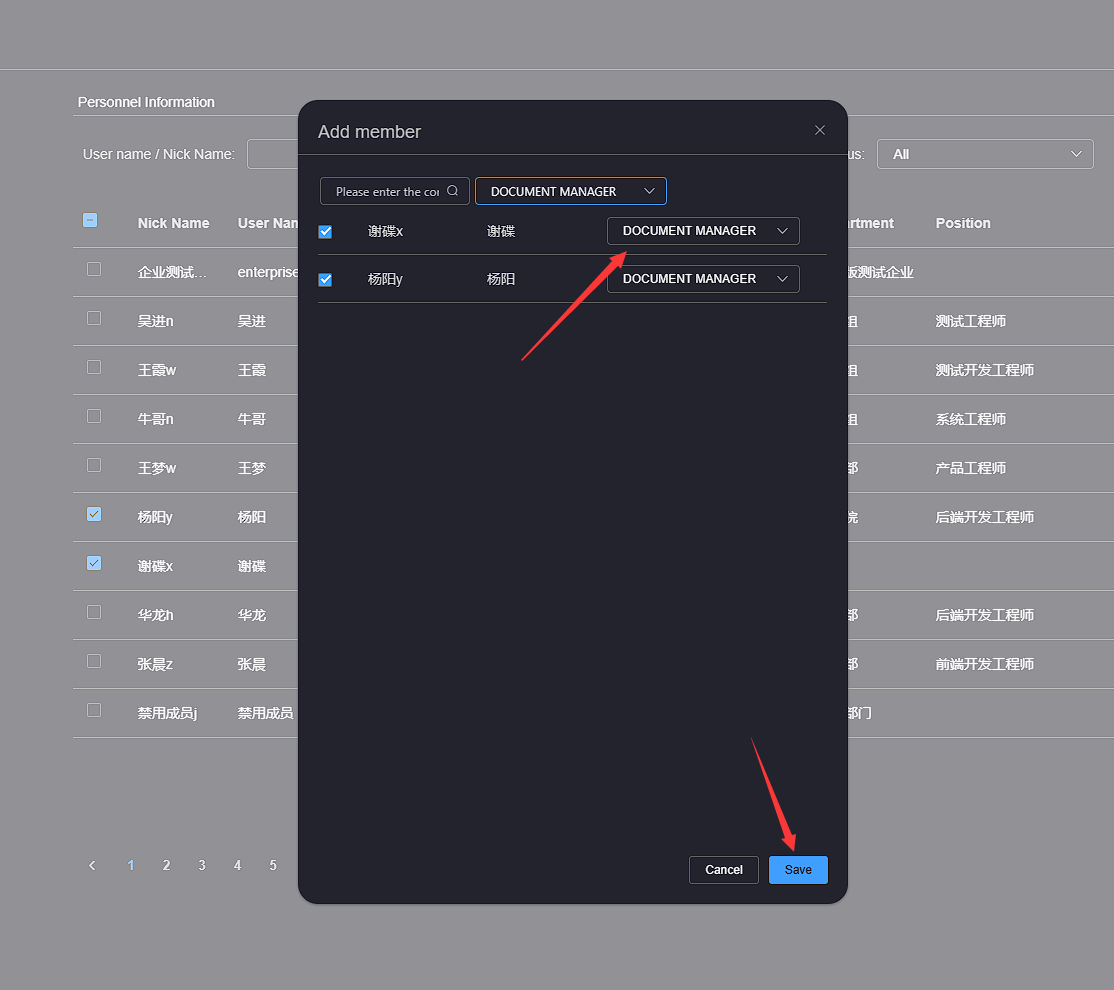
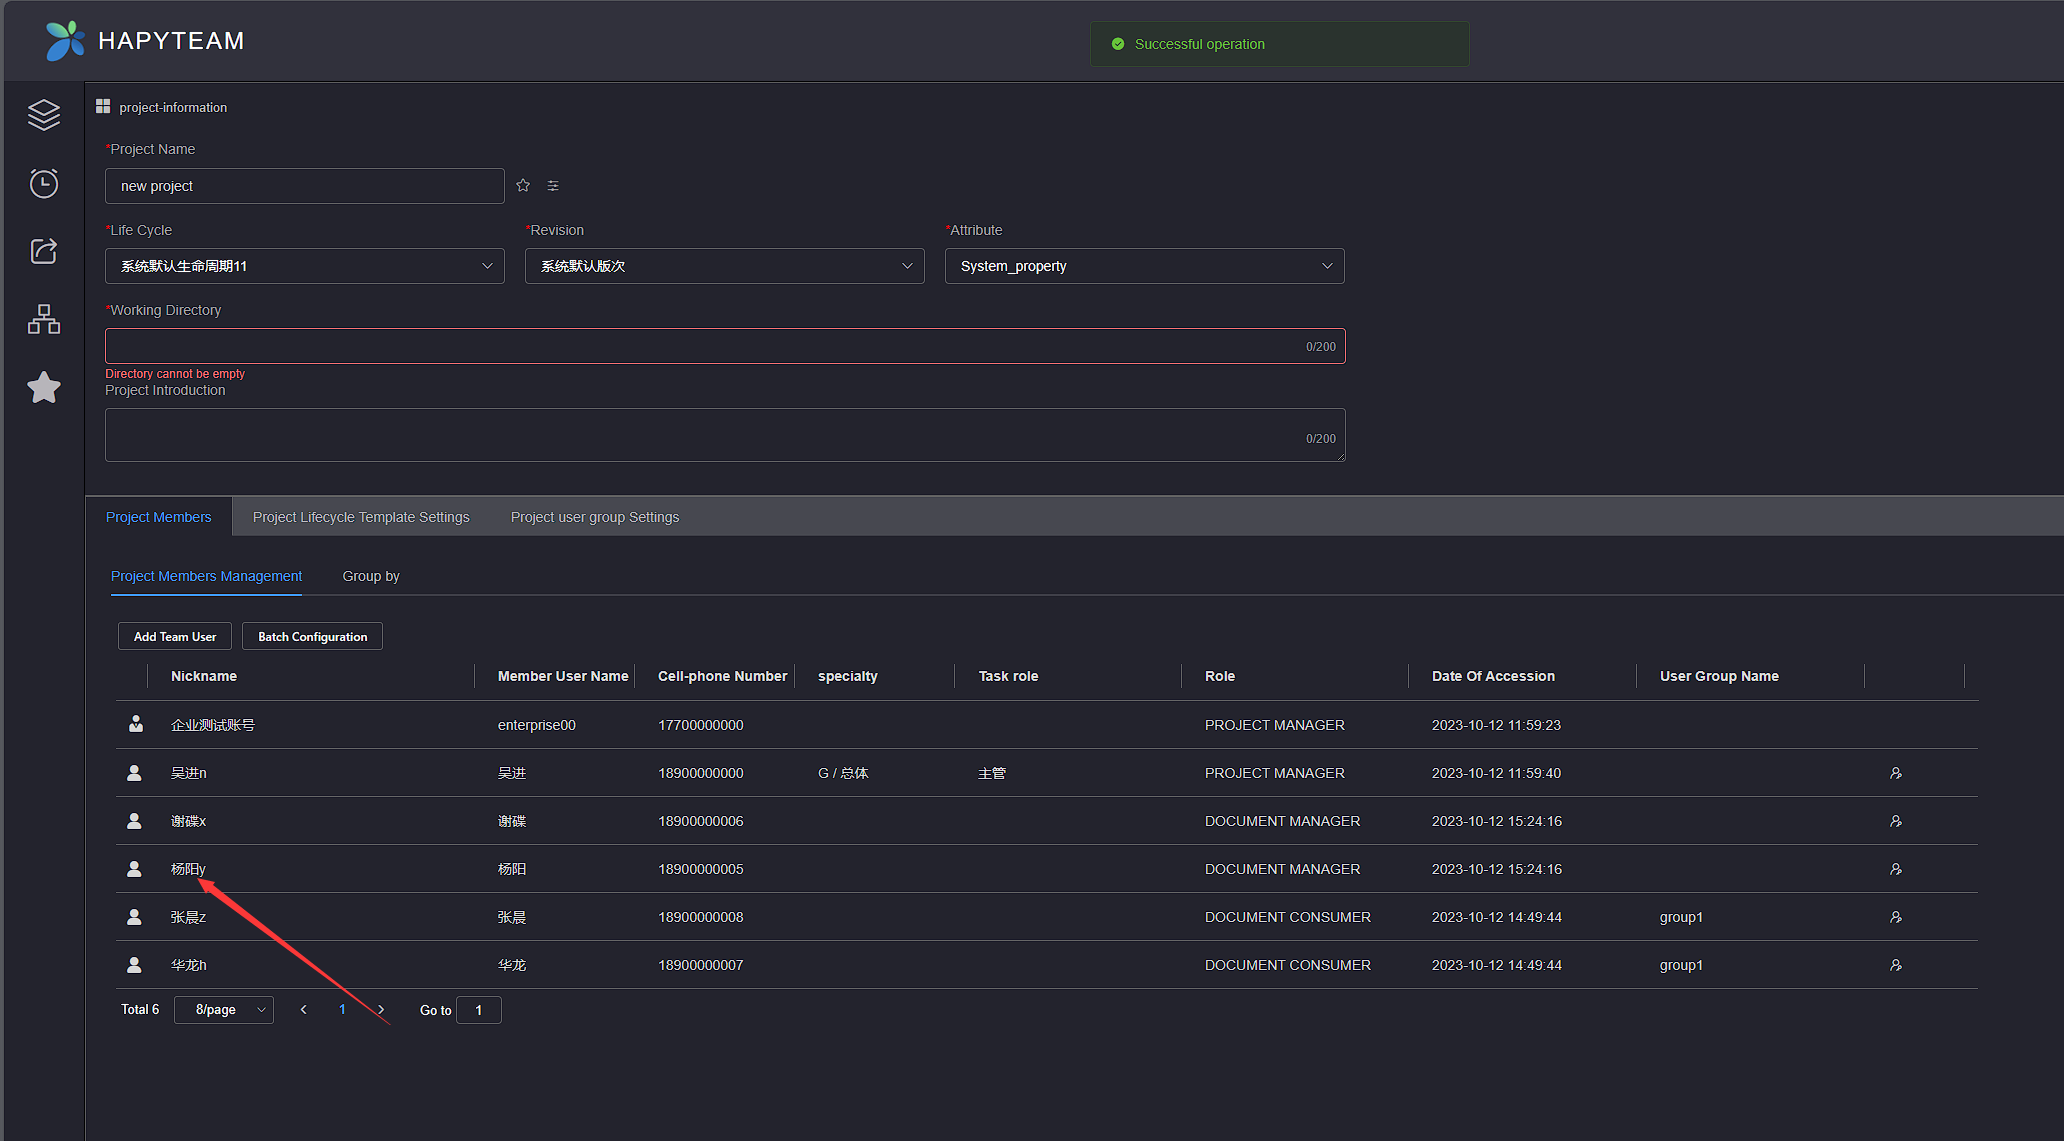
Configure the roles of the selected members, click the Save button below, and wait for the addition to complete
# 3.Delete User
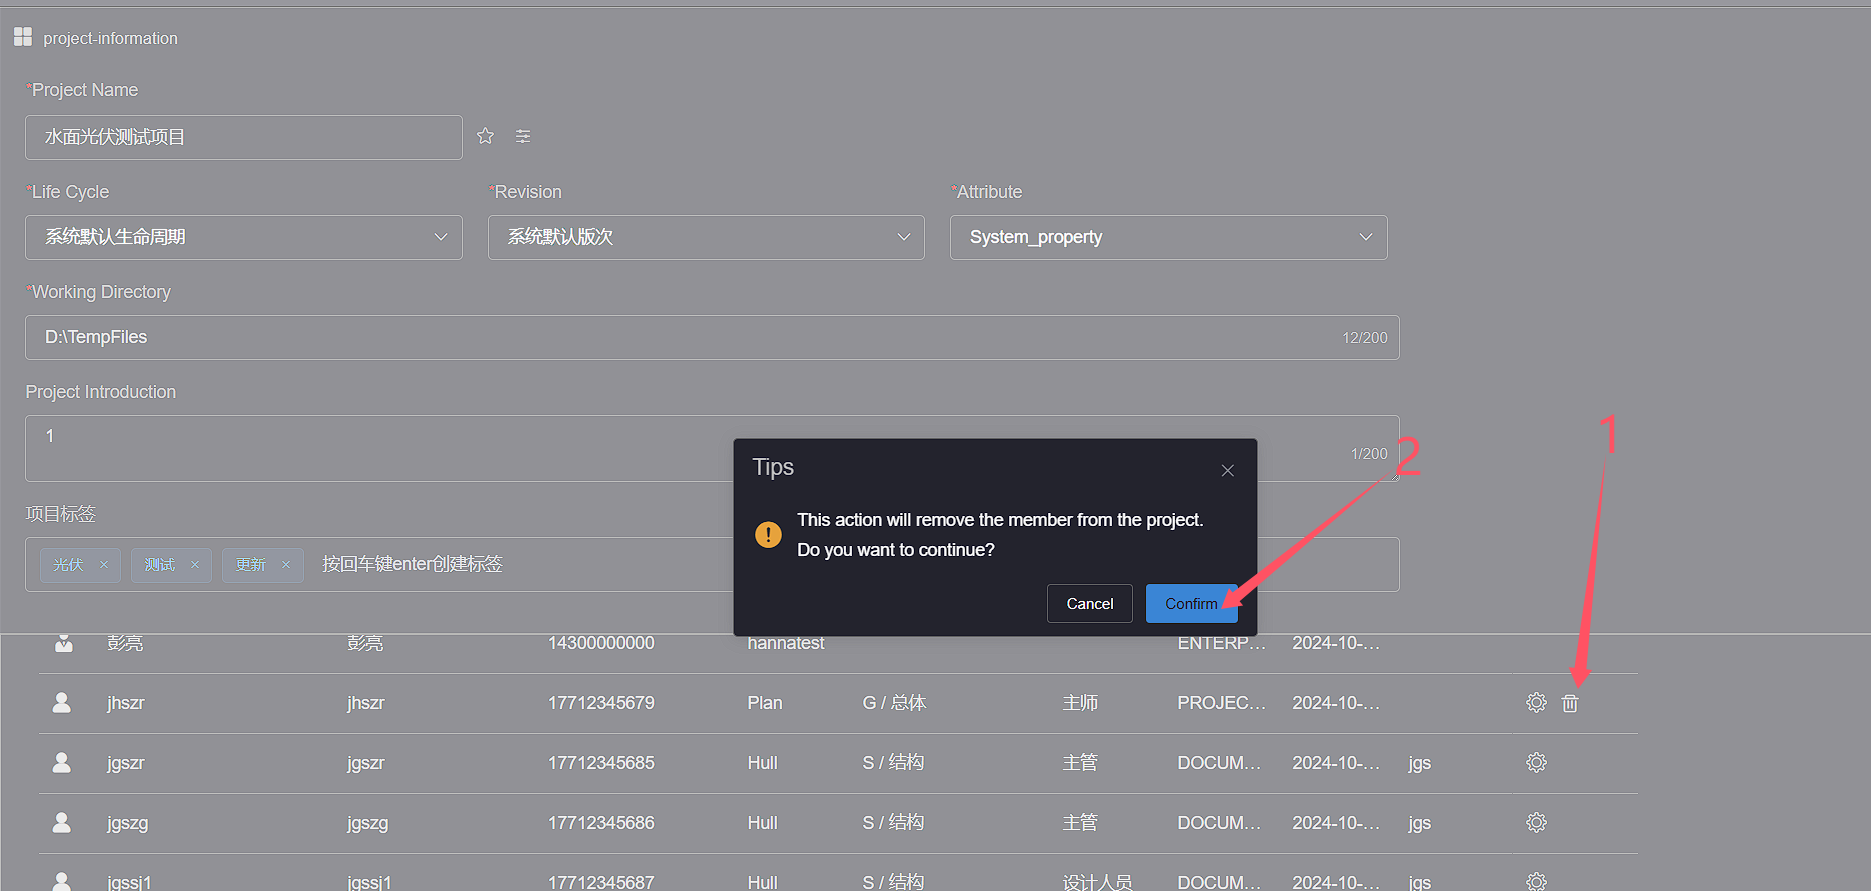
On the project user page, click the Delete button in the left operation bar of the user to be removed, and a removal confirmation dialog box will pop up. Click the confirm button to remove the user
# 4.Batch Configuration(Enterprise Edition)
Batch configuration of users as HAPYTEAM Enterprise Edition dedicated function, used for quick and batch configuration of project members' specialties and roles
On the Project Members, click on the Project Members Management, and then click the Batch Configuration to pop up a task role assignment pop-up window
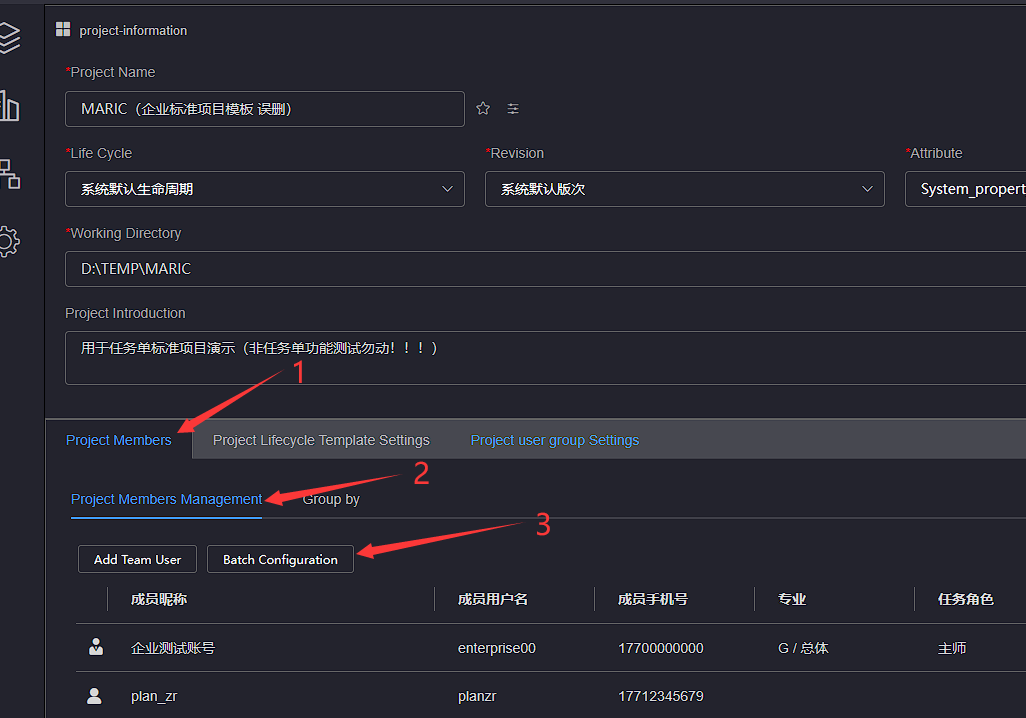
Select the project members to be configured, click on Configure Task Specialty and Task Role, and then click Save to wait for the configuration to be saved successfully

# 5.Group by(Enterprise Edition)
# 4.1 Adding a user group
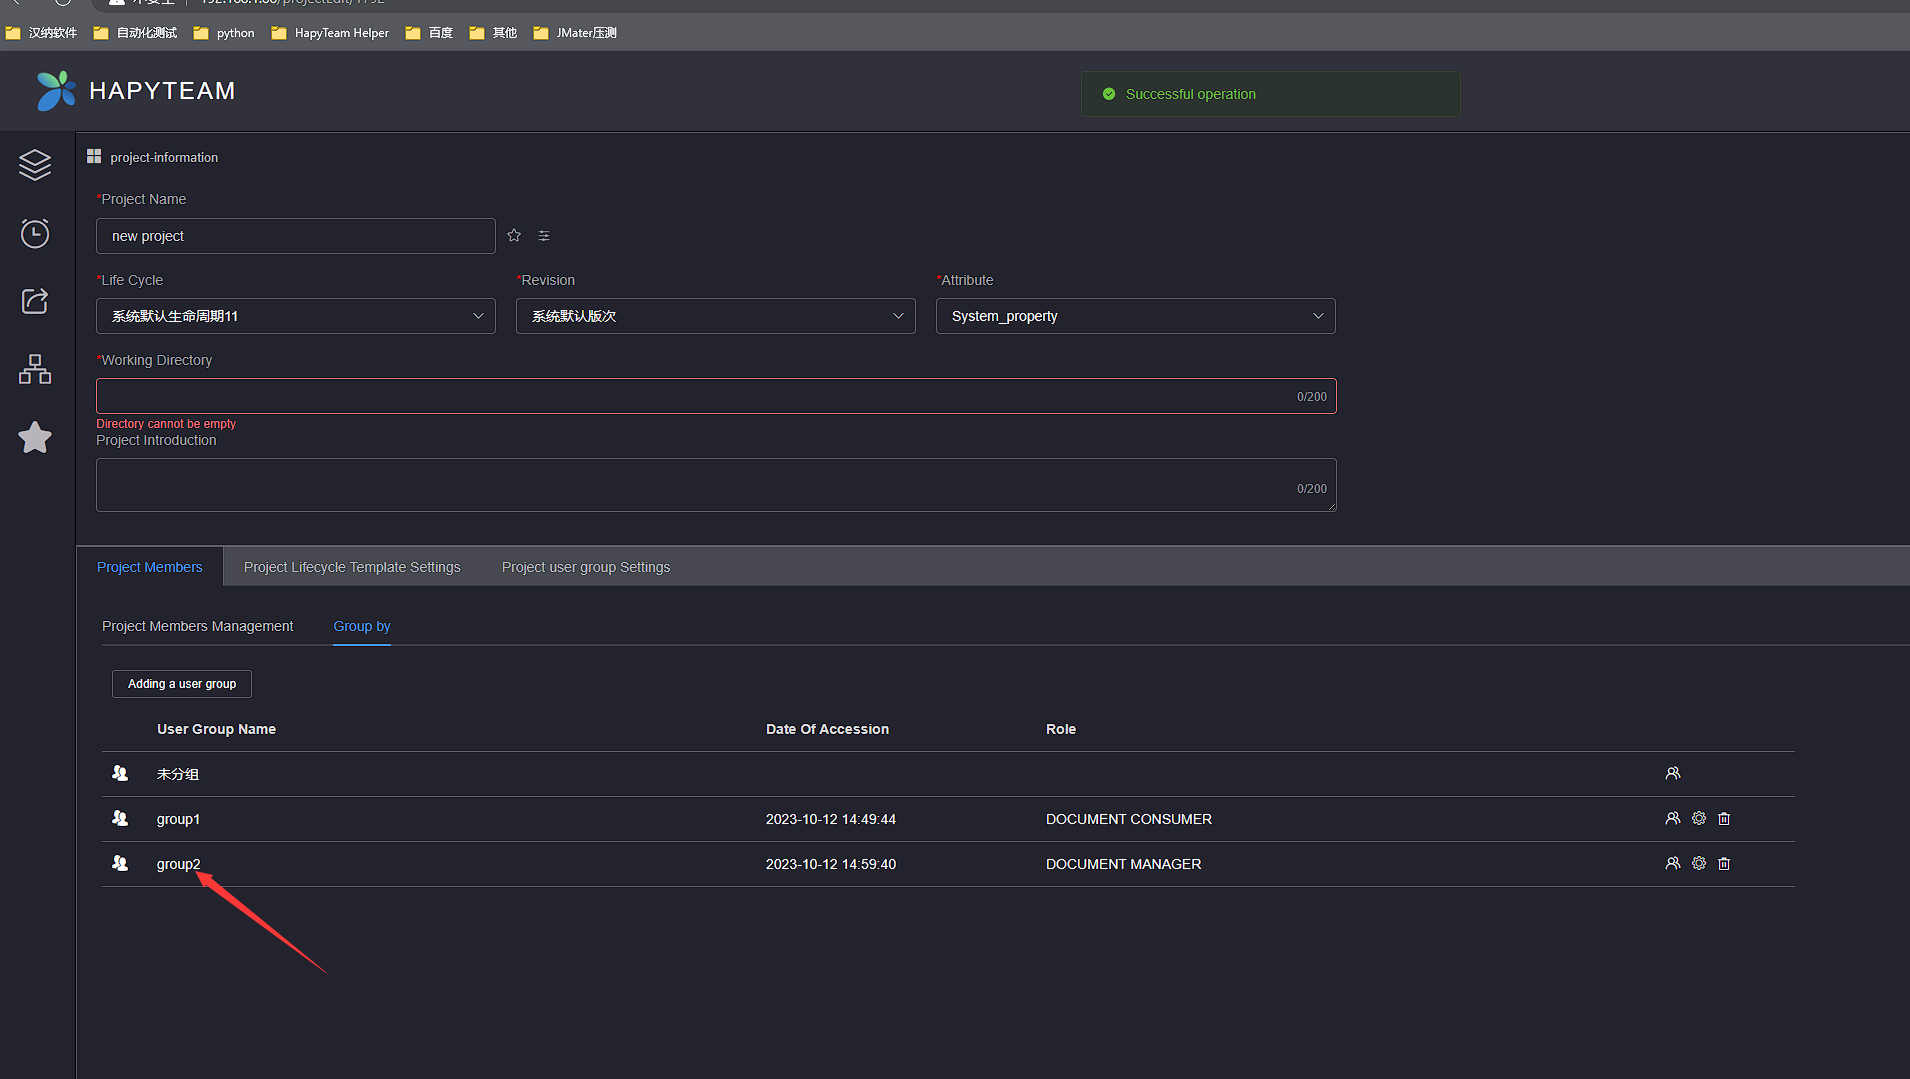
Group by as a dedicated feature for HAPYTEAM Enterprise Edition, used to add project members through user groups, facilitating group management of project members
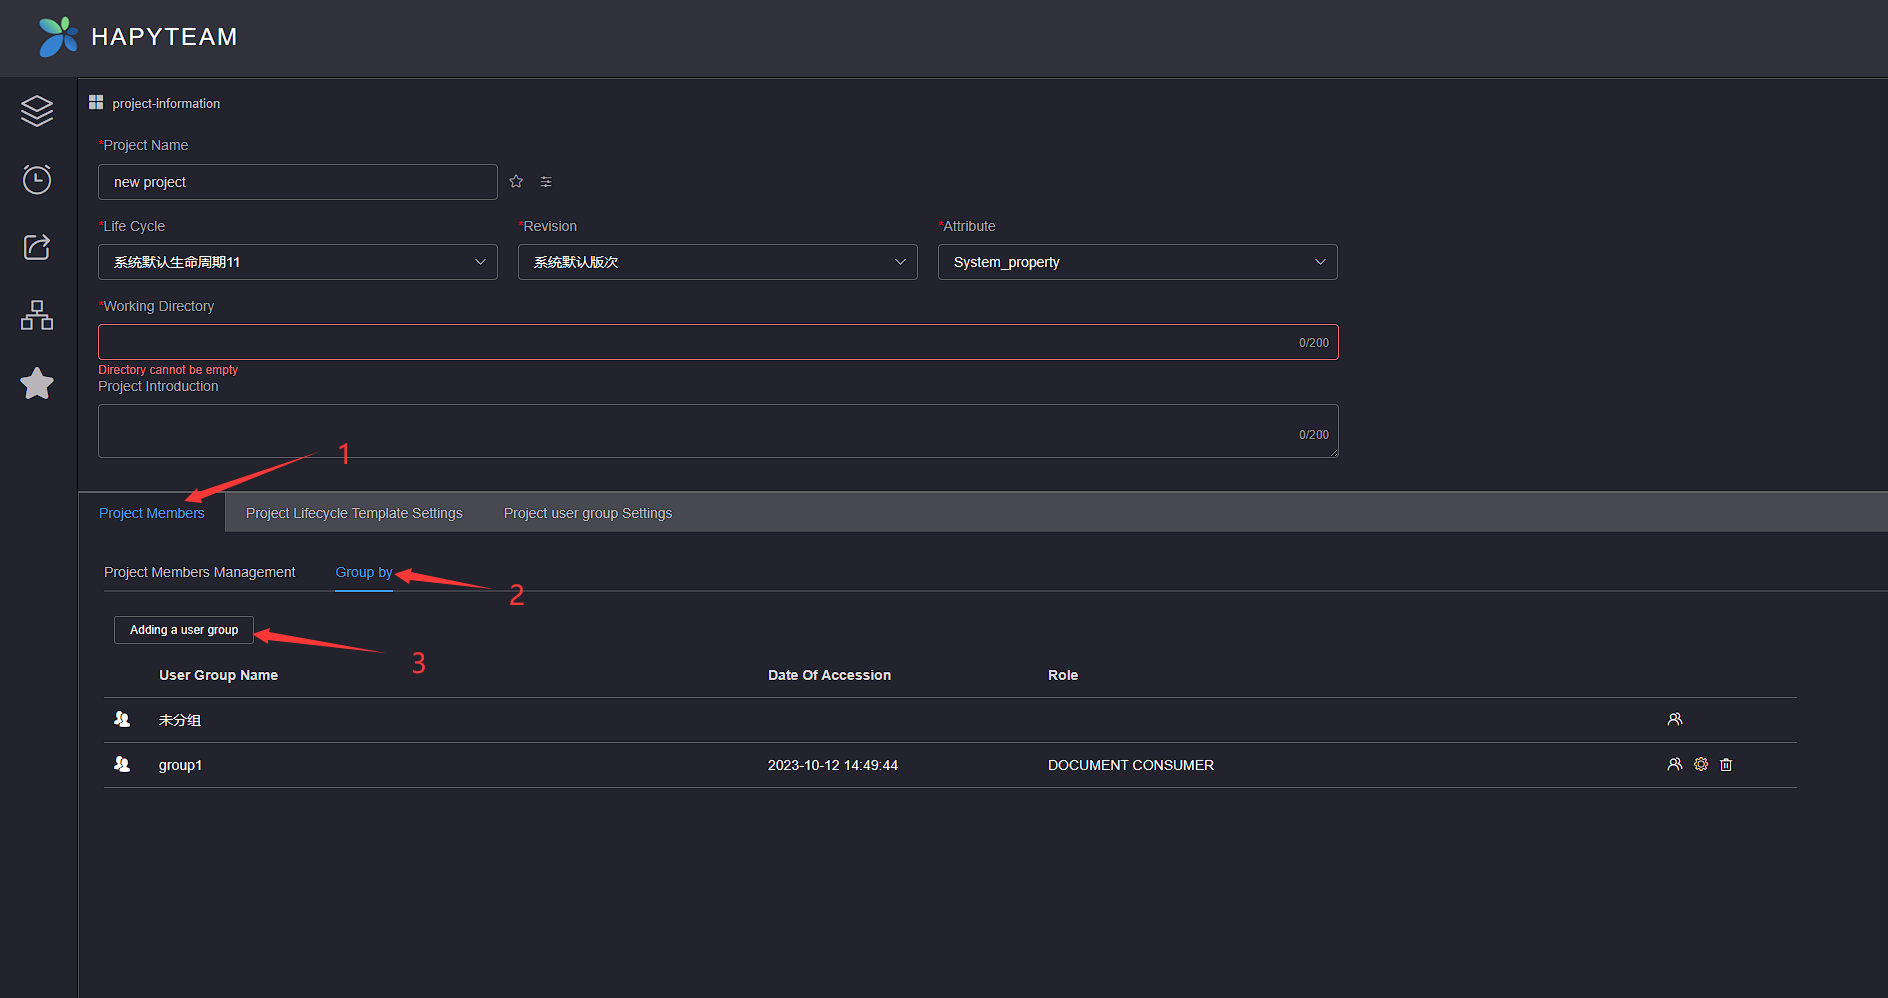
On the Project Members, click on the Group by, and then click the Adding a user group button
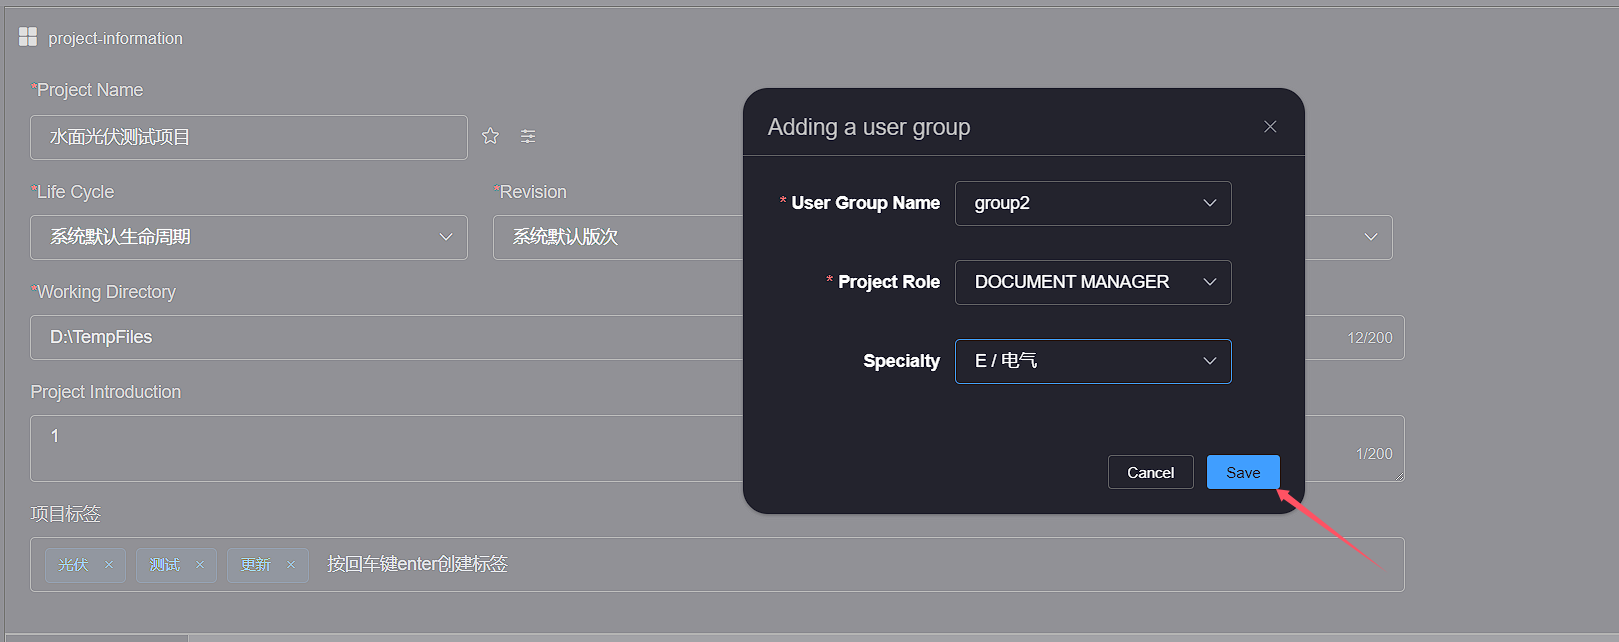
Pop up the Add User Group pop-up window, select the user group you want to add, select the user group role and Specialty, click the Save button, and you can view the newly added user group in the user group list
Empty user group cannot be added
When a user group member is already in the project, the user group cannot be added
# 4.2 Editor role
On the project user group page, click the Edit button in the left operation bar of the user group you want to edit, and the Edit User Group pop-up window will pop up
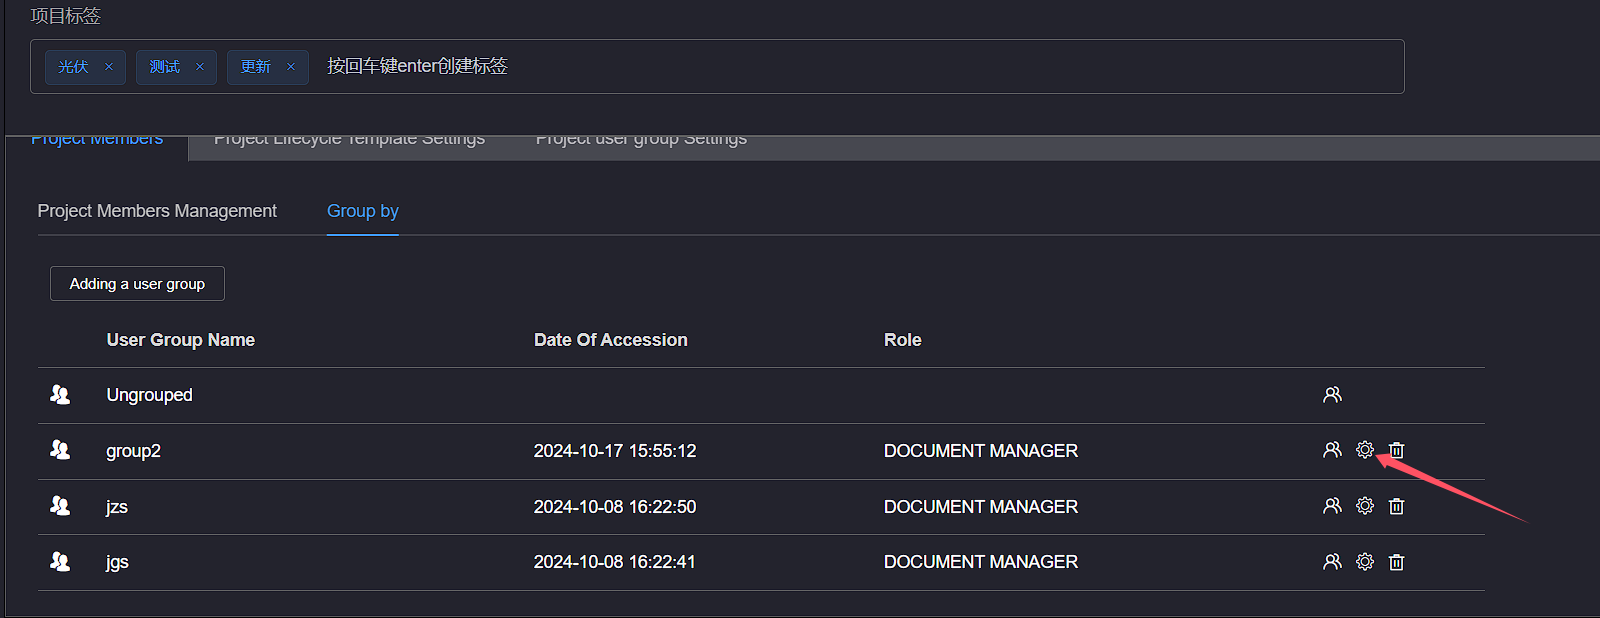
Edit user group roles and Specialty then click the Save button to view the edited user groups in the user group list

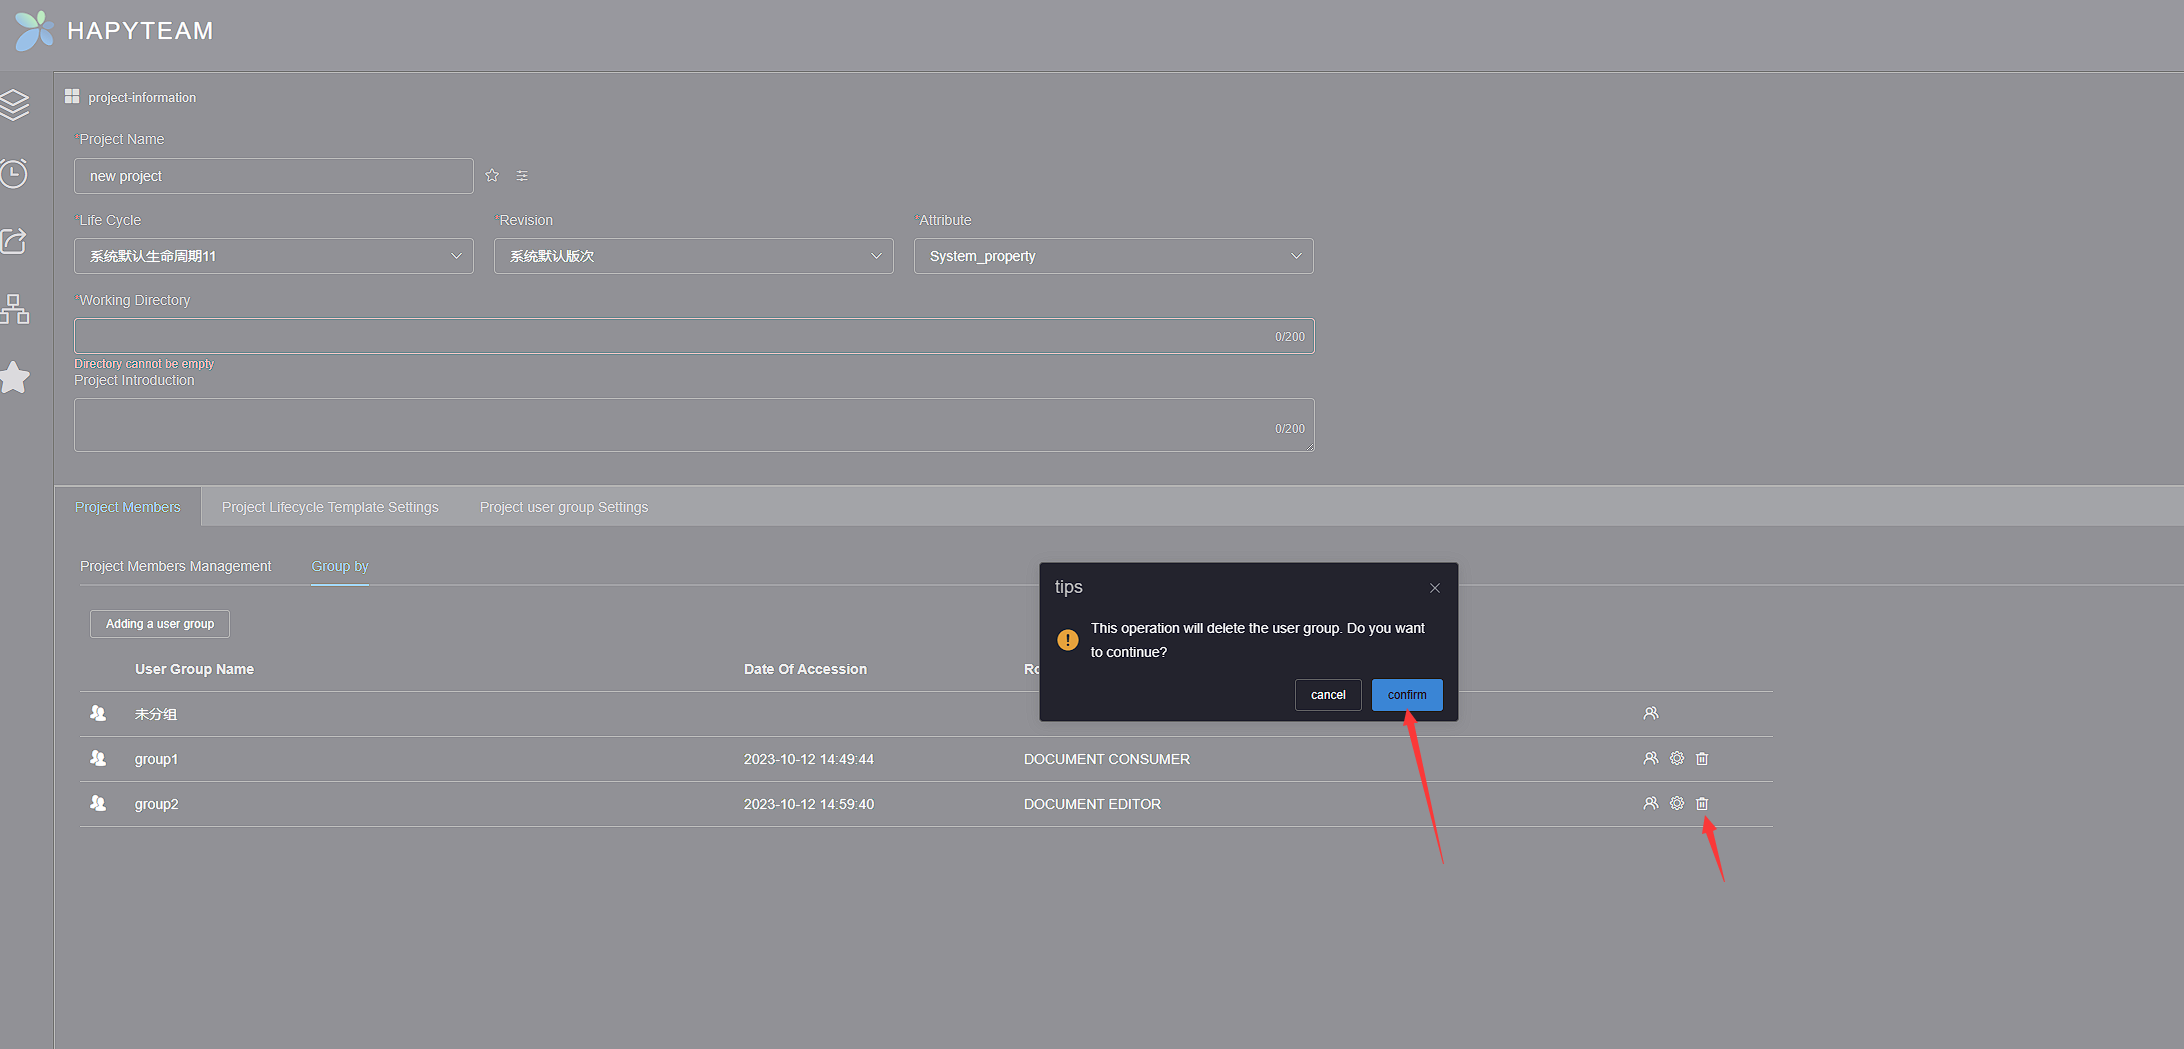
# 4.3 Delete
On the project user group page, click the Delete button in the left operation bar of the user group to be removed, and a removal confirmation dialog box will pop up. Click the confirm button to remove the user group
